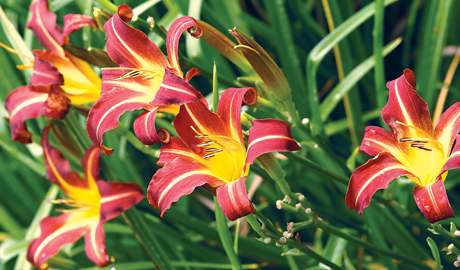
Daylily

Daylilies, the perfect perennials, are easy to grow. They are winter hardy and thrive in full sun or partial shade. The potted plants can be planted at any time of the year. Daylilies can survive and do well without feeding; and, after established, can go for long periods without water. In this minimum maintenance situation, they will bloom well at the peak time. (Some new varieties are ever-blooming or re-blooming.) If the foliage turns off color because it is too dry, watering the plants will improve their appearance. Daylilies are prolific bloomers and multiply quite rapidly, but stay in tight clumps, making them easy to maintain.
Edible: Blooms and buds are edible — please ask us for the recipes. They also make sensational garnishes.
Test Gardens: Daylilies are grown in the Jim Stauffer test gardens to test varieties for hardiness, bloom size, texture, re-bloom sturdy scrapes, and blooms per scape. The varieties sold by us are a direct result of this testing process.
Preparing Planting Beds: Although Daylilies will grow in poor soil, to grow the best blooms, larger scapes and make your plants multiply faster, the following steps should be taken:
•Remove sod from planting area.
•Rototill, spade, or turn over soil with a shovel.
•If the soil is poor, add Canadian peat moss, good top soil, compost, or till in old decomposed mulch from existing beds.
•Planting depth is very important. Set your potted plants with the top 1 ½ “ above level of the bed, then apply 1 ½ “ of mulch. This will help control the weeds and hold moisture. Plant clumps approximately 24” to 30” apart.
Weed Prevention: Apply the product according to the recommendations.
Length of Blooming Season: This is 3 to 5 weeks depending on the variety, plus re-bloom, for plant that have this capability.
Cut Flowers: Can be enjoyed by snapping off the blooms and placing them in a plastic vial.
Cleaning: Each bloom last one day, and every day you see new blooms open. Old blooms may be removed. This is not necessary, but it does make the garden look better. The small flowering varieties, such as Stella De Oro, are more self-cleaning, and this grooming step may not be necessary. When each scape of your Daylily has finished blooming, it can be removed by using a pruner.
Summer Cropping: After the first bloom period is finished, the foliage may be cut back to 12” to 14” above ground level, provided you plan to supply adequate moisture (equivalent to about 1” of rainfall each week). This procedure makes the plants respond with new foliage. You should only cut back some of your plants at any one time, so your garden looks good at all times. Do not cut your plants back if you cannot water during dry spells.
End of Season Cropping: When frost turns the foliage brown, you may cut it to 4” above ground level, or leave the foliage to serve as a mulch, but remove it in the spring when the new growth starts.
Thinning the Clumps: Daylily clumps can be thinned every 4 or 5 years by using a spade or shovel to lift 2/3 of the clump, leaving 1/3 in place. You may then divide the lifted section in half, giving you two additional clumps. I recommend either early April or late August. Now you can expand your garden, exchange or give plants to neighbors and your gardening friends. I personally give these as house-warming and hostess gifts.
Everblooming Daylilies: This group begins blooming in mid June and continues to bloom until frost. The first bloom is always the best, and some everbloomers rest a bit between blooms.
