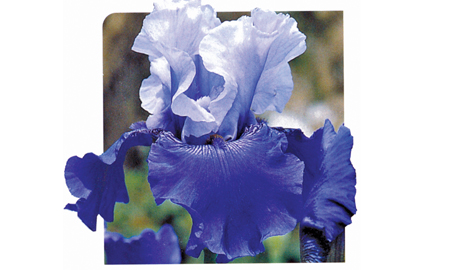
Bearded Iris

Bearded Iris are known as Iris germanica. These popular perennials come in six recognized sizes and bloom in endless variations of every color except red and green.
Location
Choose a site where they will receive full sun (6 hours) in the active growing time.
Soil Preparation
They demand well-drained soil. Cultivate the soil to 10″ (about a spading fork depth), add Stauffers Planting Mix.
Planting
Dig a shallow hole big enough to accommodate the new rhizome. Form a mound in the center of the hole. Set the rhizome on top of the mound and spread the roots down the sides of the mound. Add soil until the top of the rhizome is one half to one inch below the soil surface. Point the fan of the leaves tn the direction you want it to grow. Water thoroughly with Plant Starter, mixed according to directions, to settle the soil and start the growth.
If they are planted early in August or early September, there is a very good chance they will bloom the following spring. If planted later in the fall, they will probably produce only foliage in the first year and flowers in the fall.
Watering and Feeding
Take care not to over water. Water once every week. Feed again with Plant Starter before blooming and once again right after plants finish blooming. Do not use a high nitrogen fertilizer. This will promote heavy foliage at the expense of flowers.
After Bloom Care
After the blooms fade in spring, leave the fans of the leaves in place until late fall.
They are making food to assist the rhizome in creating offsets, which is the iris’ way of reproducing. In the meantime the striking fan-shaped foliage makes an attractive vertical accent in the garden.
In Fall
Remove old dry leaves. Cut back fans of leaves to 5″ tall.
Dividing
After the third year bearded iris should be divided. Otherwise, they will take up more space than planned for, will be bare in the center of the clump and blooming will decline. This is best
done about 6 weeks after the blooming period ends. It will allow the offsets time to make decent sized roots. It is best to withhold water for about a week prior to dividing.
Using a sharp spade, dig around and under the entire iris clump and pry the plant free. Shake the old soil away, or hose it off. Cut the leaves to about 6″; cut the long feeder roots back by 1/3.
Cut off division with a sharp knife, saving the off-shoots. Make sure each little off-shoot has a fan of leaves and some good strong roots. Discard any that are moldy, or blackened and mushy. Let cut ends heal for a day, keeping roots moist. Plant the cleaned and dusted rhizomes in freshly amended soil following the preceding planting instructions.
Pest control
The only problem pest (if any) is the iris borer — a pink white grub which eats its way into the rhizome in spring when the new leaf growth is 3 inches high. Clean the area of dead leaves and
weeds. Dust with Sevin or Malathion. Then dust twice more in 7 to 10 day intervals. Check for borers at dividing time and cut out any infected areas.
