A Guide to Repotting Houseplants and How to Keep Them Happy and Healthy

Growing your own plants can be a fun project to help spruce up your house, both indoors and outdoors. However, when people choose to go the indoor plant route, they often believe they simply need to water their plants and place them in a sunny spot to keep them happy.
Houseplants definitely need just as much attention as outdoor ones, and one of the best ways to properly nurture your plants is knowing when to repot them. Keep reading to learn the best ways to tend to your indoor plants, as well as a step-by-step guide on repotting houseplants.
Skip Ahead:
- Benefits of Repotting Houseplants
- Right Time and Right Way to Repot
- When do you Report Indoor Plants
- What Size Pot To Repot Plants
- How to Report A Houseplant
The Benefits of Repotting Houseplants
Indoor plants, like all outdoor plants and vegetation, grow. Maybe at varying speeds and timespans, but all of them share a need to intake nutrients, water, and sun — which contribute to this growth.
Repotting houseplants gives the plant and its roots more room to grow without becoming too cramped in whatever pot or container they are in. It also allows for fresh soil to be added so the plant can continue to take in good nutrients.

The Right Time and Right Way to Repot
The best time to repot plants in general is early spring, since most plants cycle through their growing season around then.
Late winter is also recommended for some varieties, since that’s around the time they have moved out from their hibernation cycles and their growth has started to increase again due to the higher abundance of sun and warmth.
There is no right answer on how often you should repot houseplants; it varies depending on the plant. Some may need it a few times a year, while others can go once a year (or even once every five years). Be aware of a plant’s signs that it needs to be repotted.
How Do You Know When To Repot Indoor Plants
The best indicator that it’s time to repot your houseplant is when you notice the following:
- The plant grows to be bigger than the pot it is housed in (causing the pot to constantly fall over due to the plant weight).
- Roots start to peek out from the drainage holes at the bottom of the pot.
- The plant is drying out more often than usual between watering periods.
- Roots have started growing beyond the root ball when the plant is removed from its pot.
- Your plant is producing smaller leaves with no signs of growth.
- A salty crust has started forming on the top of the soil.
- Insects or evidence of insects have started to appear on the plant.
What Size Pot to Repot Plants
Aim for the next size-up for the plant pot. Nothing too big, so when you water your soil doesn’t stay excessively dry. It is recommended for the pot to be about two inches in diameter larger than the initial container.
If you are reusing the same container (for another plant), be sure to wash it carefully and with the proper means. Any container is fine, but it must have at least one drainage hole at the bottom.
If you struggle with overwatering, try clay pots to keep roots dry enough. Clay also reduces waterlogging and salt buildup, as it tends to pull water and salt from potting mix.
If you struggle with underwatering, plastic or ceramic pots are best to better preserve water. Conditions such as the amount of sun, humidity of your home, plant size, time of year, etc. contribute to how much watering the plant will need.
Rather than marking days of the week or using fancy tools to tell if your plants need water, use your finger. Stick it into soil before watering, and only water if it’s dry to the touch.
Avoid decorative containers when you can (since they usually don’t have holes and water will eventually gather at the bottom). Just be sure to pour out the excess water if you do use these for your plant pot.
Occasional fertilizing is also recommended (especially material rich in minerals), so be sure to research what may be best for your plant.

How to Repot a Houseplant
- Water the plant an hour before you plan to repot, to make soil moist and removal easier.
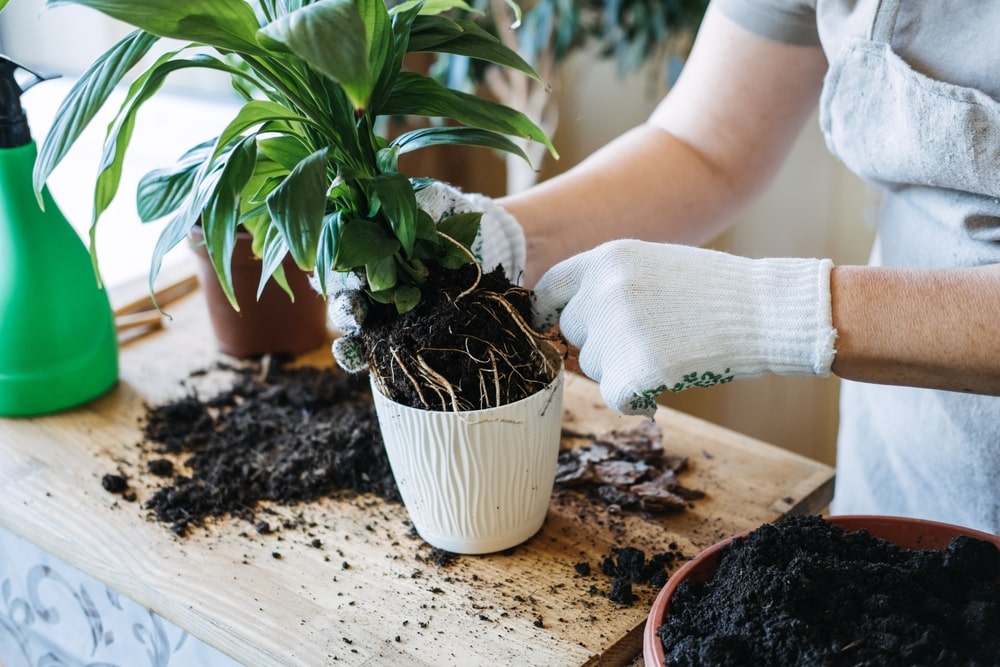
- Remove the plant from the original pot. Set the pot on its side, and by either grasping the plant at the base or shaking it, gently pull it from the pot. If the plant is stuck to the sides, lightly run a sharp tool along the edges.
- Do not pull by thinner stems; another strategy is holding it upside down while grasping the plant by soil top and between fingers and knocking the container.
- Slightly break up the root ball so the roots are loose. This will allow them to take root in the new pot and absorb water and nutrients.
- If you have circling/dead roots, be sure to cut them. Replace as much of the old soil with fresh soil as possible (without disturbing the roots).
- Partially fill your new pot with fresh soil/potting mix, enough that the top of the root ball is about an inch below the lip/rim of the pot.
- Place your plant in the new pot and make sure it is centered. Fill the pot until it is about an inch from the top and lightly pat down the soil to give enough room for growth and watering.
Note: It’s important not to pack tightly, but firm enough; tap surface level or gently press with fingertips.
8. Water your plant thoroughly (but don’t pack anymore after watering) and place in an ideal spot with good access to light. Propagation techniques are also recommended.
Note: If you just bought a plant, we recommended keeping it in the pot it came in for a few weeks so it can adjust.
Ready to start the repotting process for your houseplants? Check out Stauffers’ Online Home & Garden store for recommended materials and a variety of houseplants.
